Sunday, December 5, 2010
Let the Christmas baking begin!
I absolutely adore christmas! I think as a Christian of course it means the most to me as a celebration of Jesus' birth as our saviour, and I get a special thrill out of the fact that there are nativity scenes everywhere and so many more people are acknowledging his birth rather than just us folks who appreciate it all year round!
But I also love the traditions - the tree, the lights, the wrapping, the buying, the television and movies and of course the food!
I usually begin the season with a tree decorating party and ply my friends with gingerbread and cheese platters, champagne and lovely fun food to start the season on the first Saturday of December. Unfortunately this year Super-husband's shifts, another event and both of us getting sick got in the way of our usual plans so we had a quiet evening putting up the tree together.
But nothing can prevent me busting out the gingerbread men! and this year I had an idea to make a hybrid version - part gingerbread, part stained glass cookie (you know, the ones with the melted lollies in the cute little cookie window)
Once again I was thwarted by my fridge and pantry. I just couldn't find the butter I was sure that I had bought!
Incidentally I had the same problem with the bacon from that shopping trip too and eventually found it under the seat in the car :) What a waste of good bacon! But the butter has not yet appeared
I had 85g of butter stuffed in the back of the fridge, but that was it. And the recipe called for 200g.... what to do...
I did have a tub of cream cheese - surely that's kind of similar right?
So my hybrid became a bit more bizarre but the dough tasted amazing so I decided it couldn't be all bad and it certainly wasn't!
100g soft butter (yes, I'm rounding up to make life easier!)
100g soft cream cheese
1 cup caster sugar
2 Tablespoons honey
3 teaspoons ginger
Beat this together until light - then taste - it is divine!!
add 1 egg and beat until combined then add 2 1/4 Cups sifted flour until just combined.
Split dough into 2 lots
Roll out between 2 sheets baking paper until 3mm thick and pop in the fridge to firm up.
When firm cut out with your favourite cookie cutters and then cut smaller shapes inside.
Bake at 180C for 10mins, then get the tray out and sprinkle each little window with crushed boiled lollies - be generous so it will melt to fill in the corners- especially if you have star cutouts!
Pop back in the oven for 5 mins or until cookies and lightly browned and lollies are melted. Cool on the tray so your stained glass will set!
These were so much fun! the cream cheese adds a chewiness that you wouldn't get with normal shortbread - but is reminiscent of gingerbread and a paleness that reminds you of shortbread.
I love christmas baking!
PS. The moon shapes are supposed to be doves :)
Wednesday, November 17, 2010
Carrot and Pineapple Cupcakes
I always wonder with the blog whether it is more interesting to make crazy unusual recipes or just try out things and post the really good ones so people have a tried and tested source of recipes. In the end basically I just make what I feel like I guess - often dictated by the contents of my fridge and pantry.
This one was because I had a tub of cream cheese in the fridge and needed to use it up. So I googled "Cream Cheese Frosting" and found this little delight. These cupcakes are wonderful - The ingredients list looks a little weird but they are light as air and melt in your mouth. The recipe only makes 10 cupcakes officially -9 if you are me! Which is actually wonderful. So often I have zillions left over and feel like I eat too many myself. This way everyone in my office got one and husband and I got one each and that was it - just enough.
I think at a stretch you can even claim they are good for you - fruit, vegetables, dairy, nuts - all very good for you :)
The original recipe comes from www.exclusivelyfood.com.au
2/3 Cup Plain Flour
1/2 Cup + I T Caster Sugar
3/4 tsp bicarb soda
1/2 tsp cinnamon
1/3 Cup Oil
1 egg
1/4 tsp vanilla
1/2 cup grated carrot
1/4 cup crushed pineapple
Mix wet into dry, add 1/3 cup chopped pecans.
Bake in a 180C oven for about 15mins or until a skewer comes out clean.
Cream Cheese Frosting
Beat together
60g Cream Cheese
30g Butter
140g Icing sugar
1 tsp lemon juice
Top with a little toasted coconut.
Delicious! Really worth a try, even if you're not usually a fan of carrot cake the pineapple and pecans really add something special.
Have a wonderful day!
Wednesday, November 3, 2010
Feel Better Soup
Seeing as though Sydney is putting us through this dreadful extended wintry weather I suppose soup is not completely inappropriate in November.
I can't believe it was 30 degree all weekend and then today I had a scarf and coat on until midday - what is with that!
All this up and down weather means that flu season has arrived late and everyone seems to have a sniffle- this soup is my sniffle cure. It's actually gotten to the point where I crave it when the first symptoms appear and will drag myself half dead to the shops to pick up some ingredients if I don't have things I need for it.
Although the best part about this soup is that you just chuck in whatever you have in the fridge and hope for the best. The only must haves are chicken stock and garlic, rumoured to have restorative properties for colds, they kickstart a placebo effect that makes me feel instantly better!
This time I used:
Onion, garlic and bacon fried together
1 litre Chicken Stock
(Everyone Gasp! this time I used stock cubes! purists give up the perfectionism now - when you're sick it will work whether it's fresh or not and if you don't have homemade or a tetra pack on hand it's fine! get over it!
2 carrots chopped into little squares
1 stick celery chopped up (plus some of the tops chopped up)
1 potato grated in for a little bulk
Salt and pepper
I always serve with garlic bread to up the healthy garlic factor - plus it's just yummy!
Other things you can (and I have) pop(ped) in-
Shredded leftover bbq chicken - I've even poached a chicken breast in the cooking soup and then shredded it.
Chopped Chorizo
A tin of tomatoes
Pearl barley (I didn't love this but you might!)
Coriander and chilli and lime for a Tom yum style hit!
The depths of your fridge are the limit! Bubble the ingredients together until cooked and soft and lovely.
You'll feel better, it's simple and quick and it's actually good for you so everyone wins. In fact I could do with a steaming bowl right now, plus BBC's pride and prejudice on TV and a blanky...
Sunday, October 24, 2010
Adventures in the black forest
As a child in the 80s Black forest cake was like the holy grail of fancy desserts - something grown ups ate in restaurants.
In the 90s all that cream and fuss became deeply unfashionable for it's calories and the millions of steps it takes and now it's more of a nostalgia thing - which doesn't make it any less annoying I've discovered.
It was my nanna's 85th birthday last weekend and she has been very unwell. In and out of hospital and off her food with a stomach ulcer that has only just resolved itself. I wanted to make her something really tasty as well as beautiful for a birthday cake so I decided on a black forest cake - which I've never made before- because the lady loves cream, and there are few things as cream stuffed than black forest cakes!
Well, every recipe is spectacularly different and of course I picked a traditional german version with sliced chocolate cake, cream, chocolate mousse, cherry syrups, ganache, shaved chocolate and slices of butter cake in between the layers - the internet offers far too many choices for a perfectionist like me...
Then I bought the ingredients and started the process. Not too far in I had a meltdown. I was melting chocolate, whipping cream, reducing cherry liquid and mixing a cake simultaneously. The kitchen looked like a bomb had hit it and I was covered in cream and chocolate. Some sanity saving decisions had to be made! I scrapped the butter cake layers and chocolate mousse and all of a sudden the task became a lot more manageable.
Then I struck the next problem - the cake. It was the oddest cake batter I've ever come across:
250g Chocolate & 180g butter melted together
Beat in 250g sugar, 1.5 cups flour and 6 eggs.
Does that seem like a ridiculously small amount of flour and a ridiculously large amount of eggs to anyone else?
Anyway, I was making 2 small cakes rather than one large so I cooked up the batter in a little wedding cake topper tin.
It came out at the exact consistency of chocolate brownies- except in a giant cake shaped version- not exactly as expected.
I've since been informed that a traditional German version is supposed to be very dense - this was VERY dense so I suppose VERY traditional..
I cut it into 3 almost even slices. Then I reduced the syrup from a jar of morello cherries and plopped the cherries back in - which honestly made it just as runny again. I sandwiched the layers with sweetened whipped cream and the cherries.
The whole thing was topped with a fabulous ganache- can I just shout to the hills how wonderfully adding a teaspoon of glucose syrup to ganache works! That's a brilliant stepford secret.
95ml Whipping cream
1 tsp glucose syrup
pinch of table salt
95g chopped chocolate
20g unsalted butter
melt together gently.
Chopped chocolate went on top plus a cherry to make it look perfect. It did look beautiful and was received well by the birthday girl but I wasn't very happy with the texture. Plus imagine how tricky it would be to cut layers of dense brownie sandwiched with cream, it all slid around into something resembling trifle, yummy but not quite right.
So take two! This time I decided to make my own nod to the black forest. I had to make a dessert for a women's dessert and coffee night last night and I still had all the ingredients so this time they became black forest cupcakes.
The cakes:
Melt together 250g butter, 1.5cups water with 1 tablespoon instant coffee dissolved in it, 200g caster sugar and 200g dark chocolate.
Sift and beat in 1.5 cups self raising flour, I cup plain flour, 1/4 cup cocoa, 2 eggs and 2 teaspoons vanilla.
Bake in cases at 160C for about 30mins or until cooked through.
I then scooped out their middles and filled with morello cherries drizzled with the reduced syrup they came in (with a little sugar added) and a little of the ganache. Whipped cream was piped on top and then ganache drizzled over.
They were fabulous. My only regret is not saving a cherry for the top of each cake - I'm so pathetic that forgetting that step actually unsettled my sleep last night - what a nerd!
I think in the future my version of black forest will be the winner- even if it's not traditional, it's a bit lighter and well more aussie :)
Next time I'll take on something a bit less complex!
Friday, October 15, 2010
Aquarium Cake!
This one is backdated quite a bit - I think I made it for lovely friend Kristen's birthday about 2 years ago. My apologies for the dodgy photograph too, this is back in the days when my phone camera was the best option available...
The reason I haven't been blogging much in the last few weeks is because my lovely camera died! I'm saving up towards a new one but in the meantime I've got a few old pics that I'd love to share.
This recipe is fancy birthday cake made simple. It's so easy but super impressive and perfect for kids or young at heart adults.
You bake a cake in a roasting tin, pop it out to cool and then set a packet of blue jelly in the same tin lined with cling wrap. When it's set plonk the flat side of the cake on top and then turn the whole creation out onto your cake board and decorate to your little heart's content!
I iced the sides in blue and used lolly snakes to make the weeds. Guylian chocolate sea creatures chopped in half swim around the sea and coloured chocolate pebbles make the sandy bottom of the sea.
This recipe is from Party Cakes for Kids By Murdoch Books Pty Limited, Zoe Harpham, Jacqueline Blanchard. I highly recommend it. It is an excellent book - second only to my old favourite - The Women's Weekly Birthday Cake Book!
Have a lovely day
x
Wednesday, September 29, 2010
Chocolate self-saucing pudding (or gooding)
At our house growing up it came from a packet mix and was referred to as gooding - because it's just so good (Thanks Mum!)
I didn't ever actually realise how easy it was to make from scratch. Chocolatey sponge with a miracle sauce that just appears underneath.
This is what I made as dessert to go with Frederick the Free Range Chook in case I had difficulty eating it, I knew that there was yummy dessert coming!
But this is no ordinary gooding. I borrowed the recipe from Donna Hay's Modern Classics 2 and altered it a little because of the contents of my pantry (as always!)
The lovely thing about Donna's recipe is the addition of hazelnut meal. It alters the whole texture from a light sponge to a dense, moist pudding- plus with a kick of hazelnut flavour. Her recipe called for malted milk powder which I substituted with great success to Milo! I know it seems totally naff to get the brand name daggy products involved but ever since Nigella cooked her Ham in Coca-Cola I've felt a bit more freedom in that area :)
Anyway, the Milo was a delight and added a richness and depth to the sauce that I couldn't have produced any other way - highly recommended!
This pudding is massive! If you are feeding 8 then it would suit but for just the 2 of us I would cut the recipe in half to eat over a few nights.
135g softened butter
1 & 1/4 cups caster sugar
2 eggs
1 &1/2 cups plain flour
2 & 1/4 teaspoons baking powder
1/2 cup cocoa powder
1/2 cup hazelnut meal
1/4 cup Milo
1 cup milk
Preheat oven to 170C
Cream butter and sugar until pale. Beat in eggs. Sift in the dry ingredients and add the hazelnut meal and milk and beat until smooth.
Smooth into a greased dish.
For the sauce mix 2/3 cup brown sugar, 2/3 cup Milo, 1.5 Tablespoons cocoa and 1.5 cups of boiling water and then pour it over the pudding mix.
Pop in the oven for 45-50mins until risen and a skewer comes out clean.
Rich and lovely, I could (and sadly did) eat the sauce straight out of the dish with a spoon.
Have a lovely day
x
Thursday, September 23, 2010
Bruschetta Cups
I'll have to bypass my promised Chocolate self-saucing recipe due to popular demand.
Today I made bruschetta cups for the lovely Susie's birthday at work and now people are demanding the recipe so they can use it on the weekend - there's never been a more flattering compliment than that! I was hunting for something savoury (others were bringing sweets) and something including goat cheese (one of the birthday girl's favourites) so I hastily grabbed some quick bruschetta ingredients thinking I could think of a way to involve the goat cheese somehow on the drive home :)
This is a recipe that I first made in about 2003 adapted from a recipe in a magazine for the bread cups. It is so simple that it isn't worth the accolades!
For the bread cups you cut circles out of slices of white bread and press them into a muffin tray that has had a light spritz of cooking spray until they look like little pastry cases. I then brushed mine lightly with olive oil and sprinkled with a little salt. They then go into a 180C oven for about 15mins or until golden brown. Keep an eye on them though - the timing always seems to change! Cool them on a rack and then store in an airtight container.
For the filling I did a traditional bruschetta and a mushroom version that I invented. I just felt like 2 options was a bit more fun, and I'm glad I did - the mushroom one was definitely the more popular!
Traditional Bruschetta
Roma Tomatoes (about 5), seeded and chopped
Half a red onion, chopped.
4 Basil Leaves, chopped.
Balsamic Vinegar
Olive Oil.
Combine to taste.
Put a blob of goat cheese in the case and then fill with the tomato mixture.
Mushroom filling
1 container of sliced mushrooms (I bought them already sliced!)
1 teaspoon (or clove) minced garlic (I used from a jar!)
Fry these together in a little butter until brown - I did mine in two batches so as not to crowd the pan, take off the heat and stir through half a cup of grated parmesan/pecorino (I had a packet that was a ready grated mixture) and half a cup of toasted pine nuts (I bought a packet ready toasted!!)
Place Tablespoons full into the bread cases.
Clearly this was SO easy. And I know I sound terribly lazy for buying everything in packets ready made but it works, it was really tasty and as no one had to melt down from the stress of making it all - I think everyone wins. Obviously this includes the supermarket :)
I assembled these at work and 5 of us demolished the equivalent of an entire loaf of bread. It's the best work lunch I think I've ever had. And the birthday girl was happy too!
If you make them let me know how they go!
Sunday, September 19, 2010
Frederick the Free Range Chook
If you happened to read my facebook status last Tuesday it went along these lines:
'Just bought one of the school chickens and was given the instruction "Don't eat it tonight, it was only killed this morning." The ex-vegetarian in me feels very squeamish.'
This was followed by a flurry of comments about rigor mortis setting in and needing 2 days for the muscles to relax again so it won't be tough. Ugh. Yes, I was vegetarian. And for fluffy bunny reasons. Health reasons are actually what forced me to go back to eating meat and I don't regret it. I actually enjoy it now and have gotten over my issues.
I went from a 15 Year old who had to cut raw chicken with a knife and fork because the texture made me heave, to a 30 year old who will happily eat, cut and handle it. But rigor mortis? brought back some residual squeam. The thought that this morning it was happily pecking grass just down the path and then had a date with a person at the abbatoir and then was in the plastic bag in front of me.... I know we are all about sourcing food locally these days but this was a bit personal!
I've mentioned that I'm a school librarian. Well, the school has an agriculture plot so we often get the opportunity to buy fresh eggs at low cost to help the program pay for itself. This week was the first time I remember fresh chickens being offered and at $6.00 for a small and $8.00 for a large free range, it was an offer I couldn't pass up. It can't get more free range than being born and bred 100m from my office window. I can see how lovely it is out there. A utopia for chooks of grass, gum trees, dams and blue sky - plus the affectionate attention of Year 10 trying to get a decent grade.
The chickens were apparently a year 10 agriculture project, and they appear to have done pretty well. It was the largest "small" chicken I've ever seen. Weighing in at about 2 kilos, I had to look up how long to cook it - according to Donna Hay about 1.5hrs for the poor dear.
That was the other thing. I started referring to it as the 'poor dear' all the time as it sat in my fridge "relaxing". My friend Kate at work (the country girl) suggested it was better not to name it as that would make the process more traumatic. She then suggested if I needed to call it something i should call it "dinner" or "chicken with lemon and thyme". I thought this to be very wise but when I got it home and explained it to the lovely husband he immediately christened it Frederick. Oh dear.
Then it came to actually cooking poor Frederick. I made Husband cut off his still existing neck the night before and remove it from the blood/water in the bag.
When we gave the neck to the cat for a treat, the citified creature had no idea what to do with it, looked at us quizzically and went back to munching on her dry cat food - apparently the taste for fresh meat is not instinctual. I hear you sister. Looks yucky to me too.
It may surprise people to know that I've never actually roasted a whole chicken before. Husband occasionally does, but I always buy the deboned rolled ones from Leonards (mmm honey macadamia stuffing!) so I looked up a few recipes and decided to put cut up lemon and garlic and thyme in the cavity, - that is a kind of gross process i must say- paint him with olive oil and sprinkle him with salt, thyme and paprika.
I roasted him in a 190C oven for 1.5hrs with pumpkin, potato and some lemon wedges.
And the flavour.... it was good. I have to say I did feel a little bit odd eating it and I think that affected my view of the flavour but Husband said it was great and the house did smell delicious. I made dessert too, so that if dinner made me a bit uncomfortable I would have a yummy back up plan. More about the wonderful chocolate self saucing pudding next time!
Would I do it again? Yes. Possibly without a name next time.
Alas poor Frederick, I knew him well. And he tasted pretty decent too....
Thursday, September 16, 2010
Brown Butter Blondies
This week we are faced with renovations at work and so are moving out of large sections of our building. This might not sound too dramatic until you consider the fact that I work in a library. Moving stacks of books and resources is such a drain on the morale and energy. So I decided the office needed some sustenance to make it through.
These things are like death by brownie (well blondie actually) - Be warned: there are large amounts of butter in your future!
But how delicious, rich and intense with a flavour you've never known if you've never browned your own butter. This stuff is amazing. It gives you the impression of a culinary disaster as you watch the butter boil and turn dark golden.
I found this recipe on www.chocolatesuze.com and thought if I'm ever going to find a good opportunity to brown butter this is it!
I'll let you find the recipe on her site. It's really simple and the batter tastes awesome. Good luck getting it all into the pan without too much taste testing.
In lieu of cinnamon chips from the US I attempted to DIY them. Half a pack of white chocolate bits melted and then mixed with 2 teaspoons of cinnamon, spread out flat on baking paper and then popped in the fridge until firm then chopped into bits. This is another flavoursome delight that has to make it through the taste test. I could've eaten the melted cinnamon mixture with a spoon, and did scrape out the bowl with a spatula.
Unfortunately the batter was still quite warm and melted my lovingly made chips immediately - but the flavour was still there!
I added some white choc chips for extra texture and the lovely little squares have been eaten with great delight by the ladies in my office with one of them declaring "I think this is better than all the other treats you've brought in"
I actually think there is a bit too much butter so go easy on it and add some extra flour to soak it up if you think that will help.
Hopefully they will give us the strength to make it through - or in any case we'll burn off the huge amount of calories by ferrying huge boxes of books into storage :)
Monday, September 13, 2010
Bran and Honey Muffins
If you've read this before you'll know of my distaste of breakfast foods- although I will make a solid exception for the grilled field mushrooms at Bluewater Cafe in Manly. If I had had a camera with me on that day I would've added a restaurant review component to the blog. I could eat those every day!
But in the absence of a chef to prepare field mushrooms on sourdough with rocket, goats cheese and pesto for me every morning, I am usually a breakfast skipper who is starving by 10am and eats hopeless snacks to compensate :)
To combat this a lady I used to work with - The lovely Gail, gave me this recipe. Healthy breakfast muffins that are according to her recipe "so full of goodness that if you look at them closely you can sometimes see a halo"
1 cup wholemeal flour
1 cup bran
1 tsp bicarb soda
1 egg
3 Tbsp light olive oil
150ml honey
1 cup milk (I used soy)
1 tsp vanilla
1 cup dried fruit (I used apricots)
1 cup chopped nuts (I used pepitas and sunflower seeds - that's all I had!)
Mix wet into dry and then bake at 180C for 20mins until a skewer comes out clean.
Can be served with a yoghurt dressing- 150ml natural yoghurt, 2 tsp honey and 2tsp orange zest.
I make a batch, freeze them individually and grab one on the way to work. 20 seconds in the microwave sorts them out and I get something useful into me to get the day started.
These make the house smell divine too - using honey rather than sugar is a revelation! It's so aromatic, the house just feels cosy and comfortable.
Tuesday, September 7, 2010
Coconut & Passionfruit Slice
Well this one is pure old fashioned, daggy, fete fodder. The kind of thing you expect to find on the "school stall" on a little foam tray covered in wrinkly plastic wrap with a label sticker on top.
I say that but the last time I went to a school fete I bought amazing gingernuts dipped in dark chocolate and displayed in a mini american chinese food box with a tiny gold label- so I guess the "school stall" is moving up in the world!
I was left to my own devices on a rainy Saturday morning with an afternoon tea to bring a plate for. After I made the previously blogged Macadamia Walnut Tart my rainy day baking urge had not yet been fulfilled and I had a tin of condensed milk winking at me from the pantry.
I flicked through my big notebook of recipes and found this one.
Coconut & Passionfruit Slice
1 Cup SR Flour
1 Cup desiccated coconut
1/2 Cup caster sugar
100g butter (melted)
Mix together and press into a lined slice tin. bake at 180C for 12mins
395g Can sweetened condensed milk
1/2 cup lemon juice
2Tbsp Passionfruit pulp
Whisk together and pour over the hot base, bake for 15mins
Cool in tin, cut into squares with a hot, wet knife.
I used tinned passionfruit and lemon from a bottle - how trashy! I know - but it works and tastes like a simple form of cheesecake in slice form.
My only tip is based on my personal preference - I strained out the seeds. I can't stand little crunchy black bits interrupting the smooth creamy texture but if you like them go for it.
It has to be the easiest slice ever invented and would probably be even better with real ingredients!
Have a lovely day
xxx
Saturday, September 4, 2010
Macadamia Walnut Tart
Since I was a little girl I've always loved to cut out recipes from magazines, collect them from friends and wheedle them out of family. I have scrapbooks and notebooks full of the things I dreamed of making or thought would be glamorous dinner party options. About 5 years ago I was given a big, fat, blank hardcover notebook and I still love cutting and pasting recipes in there, in fact it's almost full and I'd say I've only made about ten of the goodies I've selected.
So I've given myself a challenge - no more purchasing cookbooks for myself (gifts don't count, and are encouraged ;) until I've made a decent dent in trying out all these things I've wanted for years. So here we go!
This one is a handwritten recipe listed as "Mardi's Pecan Pie Slice - From Kate" I used to be assistant to two lovely girls (Mardi & Kate!) in catering a women's event, and they are both wonderful cooks. Mardi used to make this often and it was always a hit.
I've altered it a little based on what was in my pantry. I didn't have any pecans but I did have macadamias and a small amount of walnuts. The waxiness of both really works well together here.
Base:
1.5 cups plain flour
0.5 cups icing sugar
150g butter
Line a tin with baking paper. Rub butter into dry ingredients until well combined and press into the tin. Blind bake for 5mins at 180C then bake normally for 10mins until light brown and crisp. Cool completely (or just a bit works!) in tin.
Filling:
2T Golden Syrup
2T Pouring Cream
1/3 Cup brown sugar
1/2t Vanilla
75g melted butter
2 beaten eggs
1T plain flour
Whisk until smooth then add 2 cups chopped nuts. Pour onto base and bake for 25mins or until golden.
Cool in the tin before cutting into slices.
This is lovely. It is the real essence of pecan pie without a pie tin or pastry. Easy to transport and serve and delicious. Good for morning tea or with a blob of cream as dessert. Yum!
Thanks Mardi and Kate!
Monday, August 30, 2010
Choc Chip, Honeycomb, Cookie Crumble Ice Cream Cake
A week or so ago I asked the handsome Husband what kind of cake he would like for his birthday.
"Icecream" was the reply.
"Home made or store bought?" I enquired. (We have a bit of romantic birthday history involving the store bought kind!)
"Home made" he said.
Well ok then! I thought of various concoctions involving his favourite things - hazelnuts, coffee and chocolate.
But eventually I went back to the best looking ice cream cake I've ever seen.
In Nigella Express she makes one that has always tempted me with it's sheer decadence so I pulled up the recipe on Nigella.com and made an ingredients list on a post-it at work. I love that Nigella is so relaxed about sharing her recipes online! It's brilliant that you can remember a recipe from one of her shows and immediately hunt down the recipe and pick up the ingredients on the way home.
My post-it said:
Good vanilla ice-cream (I used Streets Blue Ribbon)
Bourbon Biscuits crunched up (which became malt ones when I figured out that you can't seem to get Bourbon biscuits in Oz)
Choc Chips (in place of her peanut butter swirls)
a Crunchie smashed
2 flakes (my addition for decorative purposes)
Dark chocolate & Cream (for a chocolate fudge sauce)
Basically you let the ice cream soften, put 1.5L in the mixer and mix in 3/4 packet biscuits, 3/4 packet choc chips and the crunchie. Pour the mix into a springform tin lined with cling, flatten down, fold the cling back over and freeze overnight.
Decorate with crumbled flake and sit out for 5mins or so before serving.
I melted together the dark chocolate and cream for a rich fudge sauce - be careful to do this on a low heat - cream burns and changes flavour very easily.
I almost had a disaster! The original recipe also includes sugared or honey roasted peanuts. I bought the only packet Woolworths had and was about to pop them in with the ice cream when I had a quick sample. Lucky I did! turns out they were "Savoury Honey Roasted" and the ingredients included onion and garlic powder! That would've been a fine birthday story!
We invited friends over, bought ingredients for a big roast dinner (2 kinds of meat!) and then 3hrs before they were due to arrive poor old husband fell victim to a nasty sinus bug. He was Codralled up and sent to bed - party cancelled. 2 days later I took pity on the poor thing and lit up the cake just for us. We celebrated with a Farscape marathon in our PJs rather than the planned dinner with friends but the cake was still just as delicious.
Once all is well we'll be hunting down visitors to demolish the fridge full of baked dinner accoutrements - and the rest of the cake!
Have a nice day everyone! x
Thursday, August 19, 2010
A guest appearance with White Chocolate Raspberry Slice!
This little visit is from my beautiful sister-in-law Suzette.
You couldn't ask for a better person to become a relative! They say 'You can't choose your family' but fortunately she is exactly what I would've chosen if I'd had the option :)
Suze is a true Stepford wonder woman, raising 2 gorgeous daughters and still cooking lots of wonderful food in a pristine house. Amazing!
We are the family of food allergies and have to accommodate a diet where we span the spectrum of issues- gluten-free, dairy-free, allergic to Vitamin C, to coconut and allergic to gluten-free flours!
Sometimes I think we should make each person bring their own food :)
Other times I think we spend so much time accommodating that we miss out on the good things and I feel sad that people miss out or feel guilty to take care of my dairy allergy. I'd much rather that they indulged in front of me - I'm well aware of how good cheese and ice cream is - they deserve it!
This slice she made for a family birthday is just to die for, and is wicked in the sense that it contains almost every allergen we have between us. It is moist and luscious and full of my favourite raspberries.
Further joy is in how simple it is and how easy to involve the little ones in a bit of team kitchen work. I can imagine my lovely niece El with a big mixing bowl, stirring away happily helping.
The slice comes from "Marie Claire's Fresh and Fast" and it was enjoyed by many at that event - allergies and all.
Thanks so much Suze!
Pre-heat oven to 180c.
-Grease and line a 16 x 26cm slice tin.
-Melt 125g of unsalted butter and 150g of white cooking chocolate in a saucepan over low heat.
-Add 175g of superfine caster sugar and stir to combine.
-Pour into a large bowl and add 125g of Self raising flour and 90g of desiccated coconut. Stir to combine, add 2 beaten eggs and then fold in 150g of fresh raspberries.
-Pour into prepared tin and bake for 40 mins or until firm.
-Dust with icing sugar. (Makes about 20 slices).
Wednesday, August 18, 2010
Raspberry Olive Oil Cakes
I love a baking recipe that uses olive oil rather than butter.
Often it makes it dairy free without being the annoying kind of "Dairy Free" recipe that tastes bad and includes odd dairy replacements that you have to search the health food store for, but mostly it's because, let's face it, butter is annoying! Delicious - yes.
BUT you have to remember to set it out to get to squishy room temperature in plenty of time, but not too much time in summer or it's a melty disaster that won't behave as required anymore. This is not too convenient if you're desperate to knock up a little something after a long day at work. I guess it's part of my very modern 'I want it now' attitude :)
Clearly I'm not all that avid about completely avoiding dairy the way I'm supposed to(the fact that I had french onion dip and jatz for breakfast this morning clears that up immediately!) but when you can avoid it without feeling like you're missing out on the good things in this world... well that's just brilliant! I may even have one of these little cakes for breakfast tomorrow :)
I've been making these little cakes for years. They evolved from a giant slab of a thing full of blueberries, originally from a family circle magazine? to these delicate little darlings, plump with raspberries (my favourite!). Think something like a light little friand without the almond meal, or the shape - as I don't have a friand tin.
I actually do a batch as half quantities because the original is absolutely vast! So I'll put the full quantities here but feel free to halve it like I did. A half batch gives you 12 Muffin size cakes.
4 Eggs
2 cups caster sugar
1 tsp vanilla (I used the bean paste)
1 cup extra light olive oil
1 cup apricot nectar
3 cups plain flour
1 tsp baking powder
300g fresh or frozen raspberries
Preheat oven to 170C
Beat eggs, sugar and vanilla on high speed until pale and thick. Stir in oil and nectar, sift dry ingredients in and fold together.
Divide into muffin papers. Sprinkle raspberries over evenly and poke them under the batter so just a few peek out.
Bake for 50-55 mins until a skewer comes out clean.
These freeze beautifully and are lovely slightly warm. The dairy allowed among us could add white chocolate chips - that would be yum. I've also used self -raising flour (omitting the baking powder) and that worked wonderfully too with a lighter result.
These were again a hit with the lovely taste tester ladies at work - I think I'm starting to develop an addiction to the happy feeling I get from feeding people!
Have a lovely day everyone x
Monday, August 9, 2010
Apricot Macadamia Muesli Bars
So I'm not really a wholefoods kind of girl. No one who likes KFC as much as I do could possibly claim to be. You won't find me wafting around the health food store in a hemp shirt glaring at the carnivores over at the butcher shop - although I once was a vegetarian I've actually had to forgo that to improve my health! (plus now I actually do enjoy a steak...)
But I have recently started to object to all the additives and preservatives on the labels of what I eat.
As I'm intolerant of dairy I've had to have soy milk for a long time now and have only just realised how insanely long the list of ingredients is on there for something that should be relatively simple. For the same reason I use cheap margarine - and there's not a real ingredient on that massive list either. While my major interest is flavour and not being unwell, I think a major part of feeling good and being healthy is eating things in a more or less natural state.
So I spotted a bargain at the bookstore 'Coming Home to eat Wholefood for the Family' by Jude Blereau. As well as decent non dairy recipes and a not too preachy or scare factor attitude she is Australian and uses relatively accessible products as well as approving the cheaper products if you can't afford the expensive ones.
We go through stacks of muesli bars at our place. The easy option for grabbing something for work and easy for Husband when he's on a night shift - also considered to be the 'healthy option': having said that - the packets read like a novel of additives and preservatives plus stacks of sugar. Jude has a muesli bars recipe so I decided to give it a go. It has been such a hit, so inexpensive (in comparison), better flavour and better for us.
One day we may have some kids, and I don't know that I'll be one of those mums who refuses the kids the shop bought treats but if I can replace some of the day to day with better for you it just makes the treats all that much more treaty!
Muesli Bars (adapted from the aforementioned book deleting sultanas: I don't like, and coconut: husband doesn't like)
2 Cups rolled oats
1/4 cup pepitas
1/4 cup sunflower seeds
1/2 cup chopped macadamias
1/2 cup chopped dried apricots
90ml Light olive oil
45ml golden syrup (supposed to be rice bran syrup - but I couldn't get any)
45ml maple syrup
Mix together well, press into a small lined baking tray and bake for 30mins at 180 degrees C until golden. Wait until completely cool until cutting into bars and keeping in an airtight container.
Stepford tip - the centre of mine disintegrated as it wasn't as firmly cooked as the edges were. I toasted it for a bit longer in the oven just loose and served it up with milk as homemade muesli - it was lovely.
Thursday, July 22, 2010
What's for dinner?
I am always interested in what people have for dinner, regular people in their homes who have to dream up something to cook every night. I think it's fascinating what people consider to be "normal" - often because their mother made it when they were young.
Getting married has been fun in this regard. Husband comes from a family where nachos are a dinner food with mince and beans and sauce. At my house if they appeared at all they were just melted cheese on corn chips and were a special treat snack. It's taken a while for me to consider them to be a meal at all.
Equally he was surprised that I would make a roast mid-week (I make those little mini-roasts) because he's from a big family, roast was a special occasion weekend thing and quite a big deal - it was at my house too, but I've discovered it's actually a really quick prep dinner for us during the working week.
Last night's dinner was marinated grilled chicken breast - I just pop them in a bag with honey, tamari (or soy) and garlic, give them a flattening bash with the rolling pin to tenderise and stick them under the grill after a little stint in the fridge.
The real treat is one of my favourite salads. It's a version of a salad my lovely friend Rachel once made a group of us for lunch. I tasted it and immediately added it to the repetoire!
A bag of salad leaves
Small pieces of oven roasted pumpkin - sprinkled with oil, salt and pepper and roasted in a 200C oven for half an hour
pan fried chopped chorizo
grape tomatoes
avocado
feta cheese
sliced red onion soaked briefly in balsamic vinegar.
add some olive oil to the leftover balsamic and spritz over the salad.
It's delicious and filling - a meal in itself really!
So tell me, what did you have for dinner tonight?
Saturday, July 17, 2010
Baby Chocolate Souffle
The first time I made these souffles was about ten years ago. I think it's the first proper recipe I ever felt a passion to master and to be honest it's taken be about this long to get it working - not because I'm quite that hopeless a cook but more that I've recently discovered that I've been reading the recipe wrong for ten years (!!) and souffles require a bit of a delicate balance - the misreading of tsp for tbsp threw the sugar amounts WAY out. It's always tasted good but never quite rose properly. As you can see from the photograph this one certainly didn't have that problem.
I'm not just a glutton for punishment. I think souffle to 21 year old me was what macarons are to me now, a niggling challenge that I don't mind trying over and over as they generally taste good anyway and the small improvements give me a bit of a confidence boost!
Really this souffle is nothing to be scared of. It is very simple and the result is a much more impressive pay off than the effort - which is always a winner in my book!
The only thing is that they will sink after 10 mins or so - every time. So they absolutely must be served immediately.
Proof of the age of this recipe is where I got it from - an instyle magazine from around the year 2000 that states it to be Sarah Michelle Gellar's (of Buffy the Vampire Slayer fame) favourite dessert from LA's Bistro Garden.
To be honest, that fact that she liked it is probably what made me try it at the time and I'm glad I did however dated and embarrassing! Be encouraged that it was apparently also adored by Grace Kelly and Elizabeth Taylor, some decidedly more classy options if Buffy is not quite yours.
Preheat the oven to 200C, rub 2 small ramekins with butter and sprinkle the sides and bottom with sugar to coat, tapping out the excess.
Separate an egg in preparation for later.
in a small saucepan combine-
2 Tablespoons sugar
3 teaspoons cocoa
1 Tablespoon plain flour
1/4 cup milk
Cook carefully over a low heat until mixture boils and is smooth and thickened - this doesn't take long at all!
Remove from heat and stir in a teaspoon of vanilla (I use vanilla bean paste). Set aside
Beat the egg white until foamy and slowly add 2 Tablespoons of sugar until sugar is dissolved and soft peaks form.
Stir egg yolk into chocolate base and then fold the base into the egg whites gently.
Spoon the mixture into the prepared ramekins to about 3/4 full.
Bake for 15 minutes.
Important Stepford Secrets I've discovered!
- Get your measurements correct
- Grease and sugar the top rim of the ramekin for better rising
- don't be afraid to check your souffle after 10 mins.
(In my fan forced powerhouse of a gas oven the souffle's were actually ready at 10 mins but I have notes scrawled around the recipe that say at previous homes 15mins was perfect.)
- make sure the centres are still wobbly
- Bake them on a tray for ease of getting in and out of the oven.
- Dust with icing sugar to hide any imperfections.
An added bonus is that it is a very easy one to make dairy-free. Replacing the regular milk with soy seems to make no difference at all (honestly I think it's just a moisture thing and even water would work) and I grease the pots with home brand woolies margarine which has the bonus of being inexpensive as well as dairy free.
I'd love to say that this was a romantic dessert for 2 but the lovely husband was on a night shift so I'm afraid I had to do him a favour and eat his too. But don't think too badly of me, the original recipe is for souffle for one in a 280g ramekin. So technically I only ate a single portion - well that's what I'll continue to tell myself...
Tuesday, July 6, 2010
Knitted Pink Donut
Well I didn't bake it, or deep fry it for that matter, but it was still made by my hands and knitting seems like an awfully Stepford kind of thing to do.
I'm not generally a successful knitter. I blame it on my poor mathematics and propensity for distraction. Plain and stocking stitch scarves are about all I can muster when I get a bout of knitting fever - usually when it's cold outside. Counting rows and stitches is just too tricky and patterns just go out the window when there is something good on DVD to watch, but this time I was inspired.
The original inspiration came from www.thecupcakecourier.com.au where they sell Lark Knitted Gifts. I saw the cutest little pink donut on sale and wanted to buy it for my brand new niece but they were out of stock and as they are hand knitted in Bangladesh I didn't think it was likely they'd be back in store anytime soon.
So I gave myself a lecture about building some skills that actually require focus and concentration and had a hunt for a pattern. I found a free one on www.ravelry.com and decided to have a go. It has a pretty pink icing with embroidery thread sprinkles and a lovely caramel donut colour underneath (in case you can't see it in the picture!)
It was my first go of knitting in the round with double pointed needles and it wasn't too hard, with encouragement from my lovely workmate Kate who said something like "Just keep at it, the first few rows feel like you're wrestling an octopus but persevere and it gets easier". She was right.
This one is for little Zahra, but she'll have to wait until I find a pattern to make a little something for her sister too!
In the meantime the next project is a "hope bear" - this one is for a lovely charity that gives the bears to cancer patients in hospitals all over the place, if you're a knitter and you're keen send me a message and I'll forward on the details to get their patterns. Here is an article about their Coffs Harbour operation but my mum tells me there is a pick up in the Shire too. Trust me the pattern is so simple even I can manage it!! Albeit more slowly that mum who is pumping them out in their dozens!
http://www.coffscoastindependent.com.au/news/local/news/general/hope-bears-charity-wins-state-award/1792478.aspx
Have a nice day everyone x S
Tuesday, June 29, 2010
Garlic and Cheese Quickbread
Tupperware - If you know me then you'll know my intense dislike of it. I think it's born of sitting through the obligatory parties where you feel as if you are letting down a friend if you don't spend a ridiculous amount of money on something you can get for $2 at go-lo - sure it's purported to live forever but what modern woman wants to keep containers forever! I'm much more likely to buy fresh ones with the colour of my mood emblazoned on them whenever I feel like it!
I also have a grievance with a once gifted Tupperware chefs knife that has NEVER been sharp and had a warning of it's intense sharpness on it's wrapper - the thing is only good for chopping banana!
Anyway grievances aside - I received the "Cook some more" Tupperware cookbook as a wedding gift and as I am always tempted by recipes -wherever they come- from last night I had a flick through and decided to have a go at the garlic and cheese quickbread to accompany our steak and salad dinner.
It is quite a remarkable recipe - so very quick indeed! particularly as I had ready grated cheese, ready minced garlic and oddly had a chopped red onion sitting in a (go-lo) container in my fridge. The only misrepresentation is the word "bread" in the title - if you expect bread you will be disappointed. It's more like a savoury scone loaf, crumbly and dry but not with the buttery flavour of scones. The preparation took me literally 5 mins and the cooking 40mins.
Whisk in a bowl 1/3 cup milk, 1/3 cup oil and 3 eggs. Sift then stir in 2 1/4 cups self raising flour, 2tsp baking powder, 3tsp minced garlic, 100g grated cheese, salt and pepper. Press into a sprayed loaf tin top with 100g more cheese plus the onion and bake at 180C for 40mins.
Be generous with the cheese, salt and pepper. If you've got it I'd add bacon and some chopped herbs just to lift it. It really needs to be eaten right away with butter spread over each slice. It would also be worth a try in a muffin tin for individual portions.
Basically in the end it's kind of odd in flavour and texture but weirdly moreish! The house smelled divine, of cheese and garlic and onion and it looks really impressive - well worth a try even if it's just for how easy it is.
Thursday, June 17, 2010
Chocolate Stout Cupcakes with Peanut Butter Frosting
This recipe is from Donna Hay's 50th Issue Autumn 2010
I love the quirky ones and stout cake sounded like something fun to try.
You should've seen me in the bottle shop dithering over where to find the Guiness - it's never been clearer that we're not really drinkers at our place. The kind salesguy finally took pity on me and showed me the fridge section where they keep such things without laughing at me for being so naive. I finally explained that I was using it for cooking so I would seem like less of a fool and bought a bottle of wine too because he was so nice :)
But it was worth the foolishness - the stout makes for a deep, rich, dark cake that isn't too sweet and balances beautifully with the sweet salty frosting.
The original recipe is for a single cake but I made cupcakes because they are so much easier to take to work - plus I got some gorgeous papers for my birthday that were dark and beautiful too. This worked out well as it cut the 1.5hr cooking down to about 30mins in my super fan forced oven.
I also altered the frosting because I was almost out of icing sugar so it ended up as:
1 cup Peanut Butter
2T Icing sugar
1/2 cup caster sugar
1T butter
1tsp vanilla bean paste
a splash of milk (until it reached the right consistency)
The frosting was a little oily - really needing more icing sugar but tasted lovely - think Reese's peanut butter cup. I swirled it on and added a slice of mars to pretty it up.
The work ladies liked them for their lack of sweetness although the peanut butter was not to everyone's taste - but the Reese's adorers really enjoyed these.
Good fun to make and decadent but not sickly to eat- perfect!
Wednesday, June 16, 2010
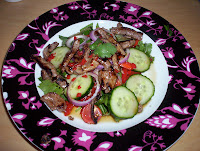
Thai Beef Salad
Just saying it makes my mouth water! How do the Thai people manage to get flavours so right. That hot, sour, salty, sweet balance that makes your tongue sing.
Plus it's healthy. This one is for the lovely friend who told me the other day that she enjoys reading my blog but can't make anything as she's on a diet. This is my version of diet food but I'm very fussy about it too.
I've eaten some terrible Thai Beef Salads in restaurants - the one with a soggy iceberg lettuce base, the one with pepper rather than chilli, the one with enormous hunks of beef. Ugh.
So I took it upon myself to make the perfect one - well, my perfect one. I acknowledge that my tastes may not be everyone else's and that it may not be authentic, i never have been to Thailand.
My first preference is using torn mint and coriander as the salad base. No salad leaves at all, I just don't think you need them.
Top with halved cherry tomatoes, sliced cucumber, sliced red capsicum (never green!!) and sliced red onion.
Then the beef, lean strips stir fried until toasty.
But most vital here is the dressing - make it to your taste and adjust the amounts as you go but basically
Lime Juice (not lemon!)
Fish Sauce
Soy Sauce
Brown sugar (could be palm sugar if you have it)
Chopped Chilli
Optional extras that I occasionally bother with but didn't this time:
sesame oil
minced garlic
minced ginger
finely chopped Kaffir lime leaf
I just toss the dressing through the salad, top with beef and then eat with great delight.
As Husband is allergic to chilli I leave it out of the dressing and just add it to mine. He's very new to Thai having avoided it fearing the chilli but we've got past the "just pad thai" to pad see ew and even a massaman curry! Maybe if I keep making it at home and altering to suit him he may get as addicted as I am.
Friday, June 11, 2010
Lemon Meringue Tarts
I've spend the last few days in bed sick which I hate. Sitting still just doesn't come naturally to me. So when I finally started feeling better at about midday today I got the itch to prove to myself that I was well again by baking up a storm.
Lovely Husband had brought some fresh lemons home from a friend at work so naturally that most traditional of Stepford treats came to mind - The Lemon Meringue Pie. I always enjoy making it because it is so simple but the finish is so spectacular, with the added bonus of being basically dairy free depending on the pastry you use.
I used a shop bought shortcrust (well, I have been unwell) and a Donna Hay recipe (from Modern Classics 2) that I tweaked a tiny bit. It turns out her amounts are perfect to make 12 tiny tarts in a muffin tray which was a necessity considering I don't own any of the required 6x9 pie tins. The muffin tray turned out to be brilliant for blind baking, cooling all in the fridge and sticking the whole lot under the grill in one go - very low maintenance.
To start with I cut out pastry circles and blind baked them in the muffin tin for 10mins and then 10mins without the baking paper and rice. My favourite Stepford tip for blind baking is to scrunch up the baking paper before flattening it out and popping the rice in - it always fits much more easily. Let them cool in the tray.
Then I made a lemon curd. 1 cup water, 3T cornflour, 1/2 cup sugar,1/2 cup lemon juice. I always check the lemon juice - if it's really sour I'd only add 1/4 cup and add a little extra water. Pop this all in a saucepan and whisk until boiling and thick. Take off the heat and whisk in 2 egg yolks and 60g butter. Set aside to cool.
When cool put a tablespoon into each pastry cup and chill.
The meringue is simply 3 egg whites and 3/4 cup sugar whipped up in the Kitchenaid until stiff and shiny. I put a table spoon on top of each tart and then put the whole tray under the grill until toasty.
I can't believe how good these are and how much the melty meringue almost approximates the squishy richness of a dairy product, sometimes us dairy intolerant folk need a bit of a treat too :)
I'm sure they must have therapeutic qualities. I'm feeling even better already!
Thursday, June 3, 2010
Strawberry Macarons Attempt #1
Tuesday was my birthday. 31. I feel like if I say it enough it might sound like it is real. I'm sure since being about 25 the rest has all been imaginary and I'll wake up one day in my old flat disappointed that I've missed out on all the fun of the past few years (and possibly slightly pleased to still be in my 20s!).
As well as the lovely Husband spoiling me with cake and decorations and gorgeous gifts (Donna Hay Subscription!). I received some lovely cookbooks from those who know me well enough to know my obsession with them. One was all about Biscuits & Macarons and as I have recently read quite a few blogs on the making of the mysterious macaron I was inspired enough to have a go.
The book had some lovely recipes, although it struck a particular bugbear of mine which is "renaming". If it is a fruit, nut, toffee biscuit with a chocolate base it is a Florentine! not a Nutty fruit delight or whatever odd name they try to pass off as their invention. Grr! - ok, rant over :)
I probably shouldn't have gotten creative with my first macarons ever but I had acquired some strawberry essence and wanted to make strawberry ones. So I borrowed the basic recipe from a different flavoured one and added my essence and some rose pink colouring.
The result? Well ok - they don't have a frill, they aren't smooth and shiny and the pink was thwarted by my fan forced oven which slightly browned them to the colour of an overcooked prawn chip. And yes I did - tap the bottom of the tins, let them rest to develop a skin for half an hour and i promise I didn't open the oven door and peek.
I did get lazy at 9pm last night when I didn't feel like making a strawberry buttercream and used a chocolate one I had already in the fridge in a piping bag - so I guess technically they are chocolate/strawberry macarons.
BUT they taste fabulous. Not too sweet with a subtle flavour and a lovely bite, and they take me back to the smell of my Strawberry Shortcake doll when I was a little girl.
I won't presume to give you a recipe until I get a proper successful batch but it was definitely fun to try and I'm inspired to keep going until I get it right. I'll test Nigella's recipe in "Domestic Goddess" next - she can always be relied upon.
Friday, May 28, 2010
Mini Bread and Butter Puddings
I need to share with you one of my eccentricities (one of many I'm afraid!). This one has to do with breakfast.
I have a significant dislike of almost all traditional breakfast foods both hot and cold when served first thing in the morning. Husband will happily eat Weet Bix every day in summer and porridge every day in winter so he is well taken care of but me...
In this regard I was definitely born in the wrong country - I saw a fabulous documentary the other day on Thai breakfasts- rice and chicken and satay sauce would suit me beautifully first thing!
I also find that if I don't want to eat what's available then I just won't eat at all, which isn't really ideal when you're heading out for a long day at work, so I've spent my life searching for other options that are quick and easy.
Other than dinner leftovers one of my breakfast favourites are these mini bread and butter puddings. If you think about it they are really similar to many breakfast foods- milk, eggs, bread, butter, sugar (and vanilla) but seem so much better to me. I tend to make them the night before whilst I'm pottering about with dinner and then pop them in the fridge. 40 second in the microwave brings them back to life beautifully.
I've simplified the recipe over time to the point of it being totally mindless to make. My usual choice is to use croissants rather than bread but we only had stale wholemeal about the place last night so that's what made the cut.
1 cup of milk (I used soy and it still tasted good and set well)
1 egg
1 Tablespoon caster sugar
1 teaspoon vanilla bean paste
Whisk these together in a jug.
Spread 2 slices of bread with butter and dust with nutmeg. Cut each into 4 pieces and pop the pieces into 2 ramekins. Pour over the egg mixture until 3/4 full.
Dab the exposed tops f the bread pieces with butter and sprinkle with demerara sugar.
Bake in a 180C oven for about 20mins or until puffed and golden. As they cool they will sink a little.
It was a fabulous wintery comfort breakfast this morning. MMMM.
Tuesday, May 25, 2010
White Chocolate Cupcakes
So I'm in the midst of a cupcake frenzy at the moment!
Last night I did my third batch of cherry ripe cupcakes (and have still only eaten one), they have been such a hit - work, welcoming new baby niece to the family and bible study supper - to be honest I'm getting sick of making them even though they are delicious.
This all hasn't been helped by the fact that Husband despises coconut so I've been doing half batches with the essence and shredded coconut and half batches without!
Ready for something new I tried a new recipe for a friend's farewell last week.
White Chocolate Cupcakes.
They are stunning, the most moist and delightful crumb ever, all due to the sour cream I think but the batter is lighter than air and they went down a treat here at work - I'm afraid I'm developing a bit of a reputation as the "cupcake lady" :)
The recipe is originally from "Couture Cupcakes" but has been blogged to death with tons of people tweaking it so I'm not sure if it resembles the original - it sure is great though - maybe the cupcake version of an idealistic Wiki - everyone improves it until it is the best it can be :)
I did a plain buttercream frosting with a bit of melted white chocolate added to it. I also did a double batch and made the second lot milk chocolate with 2 Tablespoons of cocoa and replacing the white choc with milk. They went down well with the chocolate purists who are anti white chocolate.
White Chocolate Sour Cream Cupcakes
1 cup plain [all purpose] flour
3/4 cup sugar
pinch salt
63 grams white chocolate
1/4 cup water
1/4 cup butter
1/2 cup sour cream, at room temperature
1 tsp vanilla
3/4 tsp baking soda
1 egg
1. Preheat oven to 350F.
2. In mixer, combine flour, sugar and salt.
3. Melt chocolate with butter and water. Allow to cool slightly.
4. Add melted chocolate mixture to flour mixture and mix lightly.
5. Add sour cream, vanilla, baking soda and egg and beat for 2 minutes.
6. Divide batter evenly into cupcake liners and bake for 30 - 35 minutes or until toothpick comes out clean.
7. Place pan on a rack for 10 minutes to cool. Turn upside down and release the cupcakes onto a rack to cool further.
8. Allow cupcakes to cool completely before frosting.
Friday, May 21, 2010
Cherry Ripe Cupcakes
Again I'm blogging about something I haven't eaten yet! In fact as I write a whole staff full of people are standing around a table with my Cherry Ripe cupcakes laid out on it sampling them and all I know is that the batter tasted great.
I've been discovering lately that the life of a Stepford wife is one of constantly dashing about. Making cupcakes ends up being an activity that is slotted between making dinner and dashing out to meetings and dinners. This was my experience last night where I had from 4pm until 6pm to make dinner for Husband - poor guy works 12.5hr shifts so I could hardly go out for dinner without leaving him something - wash and straighten hair, clean kitchen and bathroom and make cupcakes for an event today. They were iced and decorated at 5.55pm with me all glamoured up and swathed in an apron to protect my clothes.
The recipe comes from www.notquitenigella.com - you can head there if you want it and search under cupcakes - and even if you don't want it I recommend you do anyway just for fun! I switched her ganache for a buttercream with a little dark chocolate added to firm up the icing for transport purposes.
I also added a slice of Cherry Ripe on top to glamour them up. It's amazing how something so simple like that really impresses people (plus gives them a clue on the flavour of the cakes when I won't be there to explain!)
When the leftovers come back I'll taste test for you :)
*************************************************************************************
Well! they've just arrived and my gorgeous pink cupcake courier trays are empty! I've even had 2 complaints from people who didn't get to try one and the overwhelming verdict is that they were great - I'm even getting happy feedback passed on through others. Think I'll have to do another batch so I can taste and then bring in for the disappointed folk! (people pleaser much!)
Saturday, May 15, 2010
Tuna, Tomato and Rice Bake
Comfort Food! As soon as the weather turns cool my mind turns to fires and PJs and casseroles, risottos and puddings. But so often I find that they have a lot of fussy chopping and stirring involved, and on the days where you get home at 6.30pm and want a warm squishy dinner with minimal annoyance or cleaning up those winter warmers are all a bit much.
Today I tested a recipe I had cut out of some magazine or another years ago and had never tried out - and it turned out to be just wonderful. A store cupboard secret, it is all tins and simplicity but still gives your tummy that lovely warm feeling. I've tweaked it a bit to make it a bit more grown up!
Chop an onion and soften in a little oil, stir through one cup of arborio rice until coated and then add a 425g tin of tuna (Sirena is always my pick but any would do), a 400g tin of chopped tomatoes, 2 Tablespoons of tomato paste and one cup of white wine - this could be water if you don't have wine nearby. I also added lemon zest and the juice of half a lemon plus a handful of chopped parsley. Cover with a cup of tasty cheese.
Put it in a casserole dish and stick in a 170C oven for an hour - check the rice is tender before you serve.
I absolutely adored snuggling up with a warm bowl of this in front of the TV. You could easily prepare the night before and pop it in the oven after work.
It might not be true Stepford glamour but my excuse is that proper Stepford wives didn't work full time - plus I'm not mechanical, and we all need a throw together stand-by :)
Friday, May 14, 2010
Satay Noodle Salad
Posting about something I haven't yet eaten seems a bit odd I suppose but I just can't wait!
It all begins with my obsession with cooking shows (that I get from my mother!) I have been in swirls of delight with Channel 72's 'kitchen time' every afternoon beginning with the formidable Martha Stewart and then on to the selection UKTVfood provides - love it!
I discovered 'Ching's Kitchen' last week and was fascinated by the back story. She owns a massive factory that produces Asian style salads that sell in stores like Harrods and the show is based around her trials in their test kitchen - plus some extra treats.
So feeling inspired last night I invented my own Asian style salad for Husband and I to take to work for lunch today.
I layered up in the good old Tupperware - soaked rice noodles (pad thai) spritzed with a little sesame oil, grated carrot, sliced cucumber, red capsicum and sugar snap peas.
Then I dunked some chicken pieces in seasoned flour and shallow fried them until crisp and added them on top.
And then a satay sauce. I've made this in so many different ways and there has never been a recipe but last night I just used the residual heat in the frying pan to fry off some shallots and garlic, added peanut butter, tamari, lime juice, and a chopped kaffir lime leaf (from the garden - finally a use for them!)
My Stepford Secret here was a touch of Golden syrup. Recipes often use honey or sweet chilli sauce for the 'sweet' factor but Husband is allergic to chilli and the only honey in the house was a really strong Manuka. The golden syrup added depth and warmth, and was really helpful in rounding out the flavours.
A splash (or more) of coconut milk creamed it up and gave it a luscious texture. That went on top with a sprinkling of salted peanuts and it looks wonderful.
I promise to comment and let you know if it tastes as fabulous as it looks!
Thursday, May 13, 2010
Birthday Cake!
I've always been fascinated with those professional cakes - the smooth white icing and fondant embellishments that just seemed impossible.
So for my friend's birthday party I decided to blindly have a go! Well not completely blindly, the good old Women's Weekly Birthday Cake Book has become a bit posh of late and has expanded it's range from buttercream to the more fancy varieties.
I copied their idea for an apricot jam layer and a white chocolate ganache to seal the packet chocolate cake (you can't get too ambitious) and then had a play with the ready to roll icing. Despite getting a bit dry it turned out smooth and clean even though I (yes super overachiever!) decided it would be fun to make all the cakes different sizes and so had to fiddle a bit to cut the dimensions for each correctly.
The real trouble I ran across was in making the red icing to do the decoration and I have one vital piece of Stepford information for you - Find food colouring pastes or powders! I searched everywhere and found nothing so I attempted it with liquid colouring which was SO hard. To get the right consistency of icing - not sloppy! and the right colour - not pink was a real drama.
And it had to be RED - our theme was 'High School Musical'
eventually after a lot of massaging, chemistry with icing sugar and 'Pillarbox Red' food dye, and Pillarbox Red stained hands and clothes (and I had gloves on!) we got there, and I was pretty proud of the finished product.
It's not too hard if you do it right (pastes people!!) and everyone, especially Miss Fiona the birthday girl loved it.
I was pretty happy too :)
Subscribe to:
Posts (Atom)